
Your Guide to a Small Business Receipt Template
A good small business receipt template is more than just a pre-made document. It’s your secret weapon for standardizing proof of purchase, which helps build real customer trust and makes your bookkeeping way less of a headache. It's time to move beyond messy, handwritten notes for good.
Why a Professional Receipt Template Matters
Let’s be honest, a crumpled, handwritten note doesn't exactly scream "professional." A polished, clear receipt, on the other hand, is more than just proof of a transaction—it’s a direct reflection of your business and a crucial tool for growth. When your customers get a clean, branded document, it quietly validates their decision to choose you.
This consistency isn't just for appearances. It creates an instant feeling of legitimacy and reliability, which is a massive advantage for any small business trying to hold its own against bigger competitors. Remember, the receipt is often the very last interaction you have with a customer, so make that final touchpoint count.

Finally, Get Your Financial Records in Order
Beyond what your customers see, a standardized template brings some much-needed order to your own financial chaos. Just imagine tax season without that frantic search for missing details or the headache of trying to figure out what a scribbled note from six months ago even means. A solid template forces you to capture all the essential information—date, items, taxes, payment method—every single time.
This organized approach makes everything from bookkeeping to expense tracking a whole lot easier. When all your receipts follow the same format, you can find what you need quickly, spot sales trends, and get your tax documents ready without the usual stress. This isn't just a nice-to-have anymore; in the UK, for example, 84% of retailers were offering digital receipts in 2023. It’s a clear sign that structured, efficient record-keeping is the new standard.
Build Trust and Stay Out of Trouble
A detailed receipt is a safety net for both you and your customer. It’s a clear, indisputable record of the transaction, which is your first line of defense against any disputes over payments or services. If a customer ever questions a charge, a well-itemized receipt provides immediate answers.
More importantly, accurate receipts are non-negotiable for legal and tax compliance. Tax agencies require businesses to keep meticulous records of all their income. Failing to produce proper receipts during an audit can lead to some serious penalties. Using a dedicated small business receipt template ensures your documentation is up to snuff from day one, giving you some well-deserved peace of mind. You can check out a wide variety of free receipt templates to find one that fits your specific industry perfectly.
Think of a receipt as more than just a piece of paper. It's a legal document, a branding tool, and the foundation of your entire financial system. Getting it right from the start builds a business based on trust and operational excellence.
For a quick summary, here’s a look at the real-world advantages you get from using a professional template.
Core Benefits of Using a Professional Receipt Template
| Benefit | Impact on Your Business |
|---|---|
| Professionalism | Boosts your brand image and builds customer trust from the very first sale. |
| Accuracy | Cuts down on human error in calculations and ensures all your data is consistent. |
| Efficiency | Speeds up the time it takes to issue receipts and radically simplifies your bookkeeping. |
| Compliance | Keeps you on the right side of tax and legal requirements for financial records. |
| Clarity | Helps you avoid customer disputes by providing clear, itemized proof of purchase. |
Putting a good system in place with a solid template isn’t just about looking good—it’s about running a smarter, safer, and more successful business.
Crafting Your Receipt: The Essential Building Blocks
Think of a good receipt as a simple, clear record of a transaction. When you get the details right, it answers every question before it's even asked, protecting both you and your customer. Let's walk through exactly what you need to turn a blank template into a professional, legally-sound document.

This isn't just about plugging in numbers. It’s about building a tool that prevents disputes, keeps your accountant happy, and makes your business look sharp. Every single field serves a purpose.
The Non-Negotiables: What Every Receipt Must Have
First things first, some information is absolutely essential. If you miss any of these core details, you're opening the door to confusion, payment disputes, or a massive headache during tax season. This is your foundational checklist.
Every receipt has to start by identifying you. Make sure it clearly shows:
- Your Business Name: Your official registered name or your DBA ("doing business as").
- Business Contact Information: Add your address, phone number, and email. If a customer has a question, you want them to be able to reach you easily.
Next, lock in the transaction specifics. This data is what you'll rely on for tracking sales and referencing past orders.
- Date of Transaction: The exact day the customer paid.
- Unique Receipt Number: This is crucial. A simple sequential system (like #1001, #1002, etc.) keeps your records organized and prevents any mix-ups.
A unique receipt number is your best friend if you ever face an audit or need to find a specific sale. It’s the one thing that distinguishes that transaction from all the others, making your financial history a breeze to navigate.
These basic details establish who you are and when the sale happened. They're the backbone of any legitimate proof of purchase.
Breaking Down the Goods and Services
Now we get to the heart of it—what did the customer actually buy? Vague descriptions are a recipe for trouble. Being crystal clear here is the easiest way to prevent future misunderstandings.
An itemized list is always the best way to go. For every product or service, you need to include:
- Clear Description: Don't just write "Consulting." Be specific: "Social Media Strategy Consultation." Instead of "T-shirt," write "Organic Cotton T-Shirt, Blue, Large."
- Quantity: How many units were sold (e.g., 2 shirts, 3 hours of service).
- Unit Price: The cost for one single item or one hour of work.
- Line Total: The total for that line (simply Quantity x Unit Price).
For example, a service-based business like a freelance consultant needs a receipt with fields for "hours worked" and "hourly rate." This level of detail is non-negotiable for justifying the final bill. On the other hand, a retail shop just needs the item name and price. You can find more practical advice on building specialized receipt templates at Global Brands Magazine.
Don't Forget Your Customer's Details
Just as your information is critical, so is your customer's. While you probably won't ask for a name and address for a simple cash sale at a coffee stand, it's a must for any B2B transaction, service agreement, or high-value purchase.
At a minimum, try to get:
- Customer Name: The full name of the individual or the company.
- Customer Contact Information: An address, email, or phone number is incredibly helpful for follow-ups or if there's an issue with the payment.
This information does more than just fill a box; it helps you build a customer database and is often required for handling returns or warranty claims. It formalizes the sale and adds a layer of professionalism that makes your record-keeping far more effective.
If you want to whip up a polished receipt with all these fields in just a couple of minutes, you can easily generate your own custom receipt for free using a tool built for exactly that.
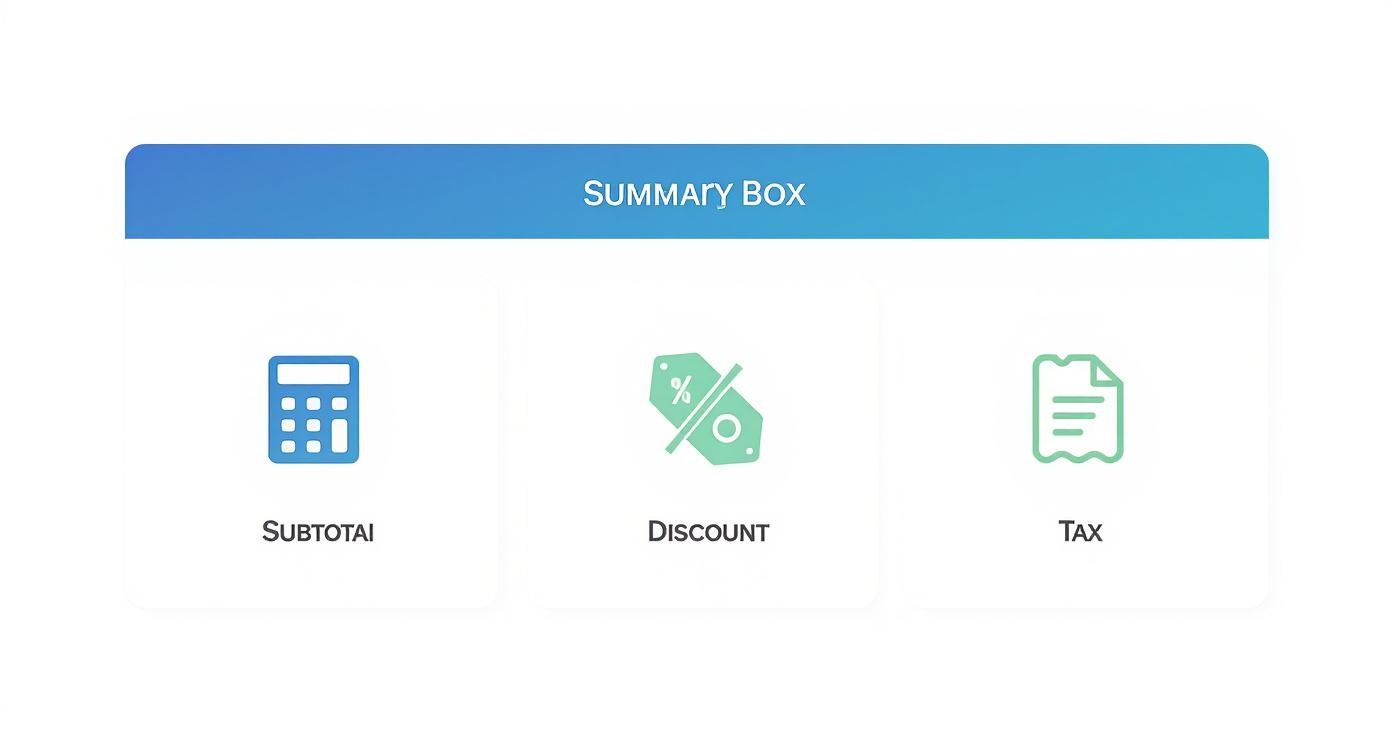
Getting the Numbers Right Every Time
Let's get to the most critical part of any receipt: the money. This is where absolute clarity is king. Every number, from the initial subtotal down to the final dollar amount, tells the story of the transaction. Nailing these details means you get paid correctly and your customer gets a transparent, easy-to-understand breakdown of their purchase.
Honestly, accuracy here is non-negotiable. One small slip-up when adding tax or applying a discount can spiral into accounting headaches and frustrated customers. So, let’s walk through how to make sure the math on your small business receipt template is perfect.
Calculating the Subtotal
Before you even think about taxes or discounts, you need a starting point. That’s your subtotal. It's simply the total cost of all the products or services you’ve listed, before any other adjustments.
Getting the subtotal is as easy as adding up the line items.
- Item 1: 2 hours of consulting @ $75/hour = $150
- Item 2: 1 project report @ $50 = $50
- Subtotal: $150 + $50 = $200
Showing this subtotal clearly helps the customer see the base value of what they're paying for before anything else gets added or taken away.
Handling Discounts and Taxes
With your subtotal locked in, it's time to factor in any discounts and then add the taxes. The order you do this in is incredibly important for getting the final number right.
First, always subtract any discounts from the subtotal. This could be a flat amount (like -$10 off) or a percentage (like -15%). Applying it directly to the subtotal shows the customer the immediate benefit of the promotion.
Only after the discount is applied do you calculate sales tax on that new, lower amount. Depending on where you are, you might call it sales tax, VAT, or GST, but the principle is the same. It's a percentage that varies by location.
A common mistake I see is business owners calculating tax on the pre-discount price. Always apply the discount first, then figure out the tax. This keeps your customers happy and your tax reporting accurate.
Here’s a quick example with a $200 subtotal, a 10% discount, and a 5% sales tax:
- Discount: $200 x 10% = $20.00
- New Subtotal: $200 - $20 = $180.00
- Sales Tax: $180 x 5% = $9.00
- Grand Total: $180 + $9 = $189.00
Documenting Payment Methods Clearly
The final piece of the financial puzzle is showing how the customer paid. This is just as vital for your own bookkeeping as it is for the customer’s records. Your receipt needs a clear spot to show the payment details.
Make sure you can note the common methods:
- Credit Card: Include the type (Visa, Amex) and the last four digits of the card.
- Cash: A simple note of the amount received works perfectly.
- Bank Transfer: If you have a reference number, add it here.
- Check: Jot down the check number for easy tracking.
Proper documentation isn't just good practice; it's essential for compliance. For small businesses, using organized receipt templates is a huge part of simplifying tax obligations. In the U.S., the Internal Revenue Service (IRS) requires you to keep gross receipts to back up your income and deductions. As you can see, a well-organized receipt is a powerful tool. If you want to dive deeper, there's a great article on the importance of receipts for tax season on monday.com.
By detailing each of these financial elements, you turn a simple proof of purchase into a clear, professional, and trustworthy document.
Tailoring Your Receipt for Your Industry
Let's be honest, a generic, one-size-fits-all receipt just doesn't cut it. The details a local coffee shop needs are worlds apart from what a freelance web developer requires, and for good reason. Using a small business receipt template that actually fits your industry isn't just a "nice-to-have"—it's a must for clear communication, accurate bookkeeping, and keeping your operations running smoothly.
When your receipt includes fields that make sense for your business, it proactively answers customer questions and gives you the exact data you need for things like inventory, service tracking, or sales analysis. This is all about turning a simple piece of paper (or email) into a genuinely useful tool.
For Retail Shops From Boutiques to Bookstores
If you sell physical products, your receipt is a direct line to your inventory control. Vague descriptions like "clothing item" are a recipe for disaster in your records and make processing returns a complete nightmare. A good retail receipt has to be specific.
Here’s what every retail business absolutely needs on their receipts:
- SKU or Item Number: This is your golden ticket for tracking. It links the sale directly to your inventory system, so you always have a real-time count of what's on the shelves.
- Clear Product Description: Don't be lazy here. Instead of "T-shirt," write "Men's Classic T-Shirt, Navy, Large." The more detail, the better.
- Quantity: Obvious, but essential—how many units did they buy?
- Return Policy: Putting your return or exchange policy right on the receipt manages expectations from the get-go and helps avoid arguments later on.
Think about it: a customer brings back a shirt without a tag. With a detailed receipt that includes the SKU, you can instantly confirm it’s your product, find the original transaction, and process the return in seconds. Easy.
For Service Providers Consultants and Contractors
When you’re selling your time, expertise, or a specific skill, your receipt has a different job. It needs to justify the final bill. The value you provide is often intangible, so your receipt has to make it concrete and show exactly what the client paid for.
A solid service-based receipt should always feature:
- Detailed Service Description: Ditch generic terms like "Consulting Work." Get specific with "Q3 Marketing Strategy Session" or "On-Site SEO Audit & Report."
- Hours Worked & Hourly Rate: If you bill by the hour, this is non-negotiable. It provides total transparency and builds trust.
- Project-Based Fees: If you charge a flat rate, break down what that fee covers. Mention key milestones or deliverables.
- Payment Terms: Clearly state expectations like "Due upon receipt" or "Net 30" so there's no confusion about when you expect payment.
This level of detail transforms your receipt from a simple bill into a professional summary of the work you completed, reinforcing the value you delivered.
The infographic below breaks down the fundamental math that every receipt needs to show clearly.
This visual shows how the subtotal, discounts, and taxes all add up to the final grand total, leaving no room for confusion.
For Restaurants Cafes and Food Service
The food service world is all about speed and accuracy. A restaurant receipt isn't just a list of what someone ate; it's a tool that helps the whole payment process run smoothly for both the customer and your staff.
Make sure your restaurant receipt includes these key elements:
- Itemized Order: A clear list of every single food and beverage item.
- Table Number and Server Name: This is crucial for internal tracking and quickly sorting out any order mix-ups.
- Gratuity/Tip Line: You have to include a dedicated, easy-to-see space for customers to add a tip. It’s standard practice and vital for your team.
- Split Bill Information: If the check was split, the receipt should clearly show how it was divided to avoid confusion.
A well-designed restaurant receipt actually helps you turn tables faster. When the bill is easy to read and the tip line is clear, customers can pay and leave more quickly, which improves the dining experience and your bottom line.
To give you a clearer picture, here’s a quick breakdown of how these specialized fields differ across industries.
Industry-Specific Receipt Fields at a Glance
| Field Type | Retail Business | Service Business | Restaurant |
|---|---|---|---|
| Unique Identifier | SKU/Item Number | Project ID/Case Number | Table Number |
| Description | Product Name, Size, Color | Service/Task Description | Menu Item Name |
| Unit of Sale | Per Item | Per Hour / Per Project | Per Dish/Drink |
| Staff Info | Cashier Name/ID | Consultant/Contractor Name | Server Name |
| Special Field | Return Policy | Payment Terms (Net 30) | Gratuity/Tip Line |
As you can see, what's essential for one business is irrelevant for another. This is why grabbing a generic template and calling it a day just doesn't work.
For businesses that need a bit of everything, a flexible template is your best bet. You can check out a powerful Generic POS Receipt template that can be easily customized for many of these retail and service situations. Taking a few minutes to tailor your template is a small effort that pays off big in professionalism and efficiency.
Turning Your Receipt into a Brand Asset
Think about the last time you made a purchase. That little slip of paper—or email—is often the final interaction you have with a business. It’s so much more than just proof of a transaction; it's a golden opportunity to leave a lasting, positive impression.
Instead of seeing it as a throwaway document, treat your receipt like a mini-billboard. It’s your chance to reinforce your brand, show your appreciation, and stay on your customer's mind long after they’ve left. A thoughtfully designed receipt signals professionalism and attention to detail, making your business stand out.
Incorporate Your Visual Brand Identity
First things first, your receipt needs to look like it came from you. Consistency is everything. It should feel like a natural part of your brand, just like your website, social media, or storefront.
Here are a few simple ways to make that happen:
- Add Your Logo: This one’s a no-brainer. Placing your logo right at the top is the single most effective way to brand your receipt.
- Use Brand Colors: Even a pop of your signature color in the header or for key text makes a world of difference. Many modern receipt printers and digital templates handle basic color, so don't be afraid to use it.
- Choose a Professional Font: Stick with a clean, readable font that matches your brand’s vibe. Avoid anything too fancy or hard to read—clarity always wins.
These small touches work together to create a look that’s cohesive, professional, and instantly recognizable.
Add a Personal and Informative Touch
Beyond the visuals, the text on your receipt is a direct line to your customer. This is where you can be helpful, express gratitude, and nudge them toward their next interaction with your business. A few thoughtful additions can turn a sterile document into a powerful relationship-builder.
Consider adding these elements near the bottom:
- A Sincere Thank You: A simple, genuine message like "Thank you for supporting our small business!" makes customers feel truly valued.
- Return Policy: State your return or exchange policy clearly. This manages expectations and helps head off potential headaches down the road.
- Contact Information: Make it easy for people to find you again. Include your website, email, and social media handles.
A study found that 70% of consumers are more likely to recommend a brand with a good loyalty program. Your receipt is the perfect place to mention yours, maybe by offering a small discount on their next purchase or inviting them to sign up.
This approach turns your receipt from a simple record into a useful resource. For example, a local bakery could add a quick note like, "Follow us on Instagram @[YourBakery] for daily specials!" That simple call-to-action can directly boost engagement.
Keep it Clean and Organized
A beautifully branded receipt is useless if no one can read it. A cluttered, messy layout will only frustrate customers and weaken the professional image you're trying to build. The key is to find the right balance between brand elements and pure, simple clarity.
To make sure your design works, stick to these best practices:
- Prioritize Readability: The most critical information—the itemized list, totals, and your business details—should be impossible to miss. Use bold text to make key figures pop.
- Use White Space: Don't feel the need to fill every millimeter of the receipt. Giving the content room to breathe makes it feel less overwhelming and easier to scan.
- Create a Clear Hierarchy: Use different font sizes and weights to create a visual flow. The logo should be at the top, the transaction details in the middle, and extra info like return policies at the bottom.
By blending thoughtful design with genuinely useful information, your small business receipt template goes from being a necessity to a strategic asset that helps build stronger customer relationships.
Your Questions on Business Receipts Answered
Even with the best tools in hand, questions are bound to pop up. When it comes to something as vital as your financial records, you need clear, direct answers. Let's dig into some of the most common questions I hear from small business owners about creating and managing receipts.
This is all about getting you the right information quickly, so you can handle your transaction records with complete confidence.
Do I Legally Need to Provide a Receipt for Every Transaction?
While the specific laws can vary depending on where you operate, getting into the habit of providing a receipt for every single sale is just smart business. For your own books, you absolutely must track all your income for tax purposes. For your customer, that receipt is their proof of purchase—essential for returns, warranties, or simply tracking their own spending.
In business-to-business (B2B) deals or for any large purchase, a receipt isn't just a nice-to-have; it's often a legal necessity. A great, cost-effective way to handle this is by offering digital receipts via email. This keeps you compliant without the constant cost of paper and ink.
What Is the Difference Between a Receipt and an Invoice?
This one trips a lot of people up, but the difference really just comes down to timing. An invoice is a request for payment you send to a client before they pay you. A receipt, on the other hand, is the proof of payment you issue after the money has been successfully collected.
Think of it this way:
- An invoice says, "Here's what you owe me."
- A receipt says, "Thanks, we're all paid up."
In situations where payment happens on the spot, like in a retail shop, a single document can sometimes pull double duty. You might see this labeled as a "Paid Invoice," which confirms both the transaction details and the payment all at once.
The key takeaway is simple: invoices ask for money, and receipts confirm money has been received. Keeping them distinct in your accounting is crucial for clear financial tracking, especially if you need to manage outstanding payments.
How Long Should I Keep Copies of My Business Receipts?
When it comes to record-keeping, it's always better to be safe than sorry. Tax agencies have very specific rules, and the last thing you want is to be caught without the right documents during an audit.
In the United States, the IRS generally advises small businesses to keep records that support income and deductions for at least three years from the date you file your tax return. However, that period can jump to six years or even longer in certain cases, like if you significantly underreport your income. It's always a good idea to check the specific regulations in your city and state.
This is where a digital small business receipt template really shines. Storing digital copies in the cloud makes it incredibly easy to archive and pull up records whenever you need them, without turning your office into a paper-filled storage unit.
Can I Create a Small Business Receipt Template in Word or Excel?
Absolutely. For many business owners just starting out, Microsoft Word or Excel are perfect for creating a basic receipt. They're familiar, accessible, and you probably already have them.
Excel is especially handy for this because you can build formulas to automatically calculate your subtotals, apply discounts, and add taxes. That feature alone can dramatically cut down on human error, which is a huge win for keeping your books accurate.
You can find plenty of free, downloadable templates online to get you started. As your business grows, you might eventually move to specialized invoicing software. But for getting off the ground, these tools are more than capable of producing a professional, functional receipt.
Ready to create professional, accurate receipts in just a few clicks? With ReceiptMake, you can choose from over 100 industry-specific templates, customize them with your brand, and download a perfect PDF in seconds—all completely free and with no sign-up required. Start generating your free receipts now!

