Mastering Retail Store Closing Procedures A Practical Guide
Locking up for the night is the very last thing you do. Before you get to that point, a solid set of retail store closing procedures is your best line of defense against all the little things that can go wrong—cash shortages, inventory screw-ups, and even security breaches. If your closing process is rushed or inconsistent, you're leaving the door wide open for problems and adding a ton of stress to your team's plate.
Why a Smart Closing Routine is Your Secret Weapon
A great closing routine isn't just about finishing the day. It's about setting up the next day for success. When every single employee follows the same standardized checklist, you dramatically cut down on the human errors that cause those frustrating financial headaches. This isn't about micromanaging; it's about building a predictable, reliable system that protects your bottom line and gives your staff total clarity on what needs to be done.
Think about it this way: I once knew a boutique owner who was constantly finding her cash drawer short by small amounts, maybe $15 here, $20 there. It was maddening. Her closing process was totally informal—whoever was on shift handled it their own way. Once she put a strict, step-by-step procedure in place, she found the culprit: inconsistent handling of petty cash slips. Now, for any small purchase, they use a simple sales receipt template to track every penny. The mystery was solved, and she stopped losing hundreds of dollars a month.
The Three Pillars of a Rock-Solid Closing Routine
A truly effective closing plan is built on three core pillars. If you neglect one, the whole structure gets wobbly.
- Precise Financial Reconciliation: This is all about making sure the money is right. It means counting every till, prepping the bank deposit, and settling the credit card terminals. No exceptions.
- Thorough Store Preparation: This is where you get the store ready for tomorrow's battle. It involves cleaning, restocking shelves, and organizing the sales floor so the morning crew can hit the ground running.
- Unwavering Security: This part is non-negotiable. It covers everything from checking every single door and window to arming the alarm and doing one final, careful walkthrough.
For truly bulletproof and consistent retail store closing procedures, mastering standard operating procedure templates is a game-changer. It takes your closing from a rushed, end-of-day chore to a smart business function. Having it all written down also makes training new people a breeze, ensuring everyone is on the same page from their very first shift. Keeping proper records, like using a parking receipt for any employee travel expenses or a generic receipt for miscellaneous odds and ends, is key to maintaining those perfect records.
The goal is to make your closing process so routine that it becomes muscle memory for your team. This consistency is what separates well-run stores from those constantly fighting preventable fires.
Getting Your Money Right: The End-of-Day Financial Close
Once the last customer has gone and you’ve locked the doors, your most important job begins: settling the day's finances. This isn't just about counting money; it's the bedrock of a healthy retail operation. One slip-up here can cause a domino effect of accounting headaches, inventory questions, and a general lack of trust in your store's numbers. Let's walk through how to nail your financial close every single night.
The whole closing routine really boils down to three main pillars, and it all starts with getting the finances locked down.
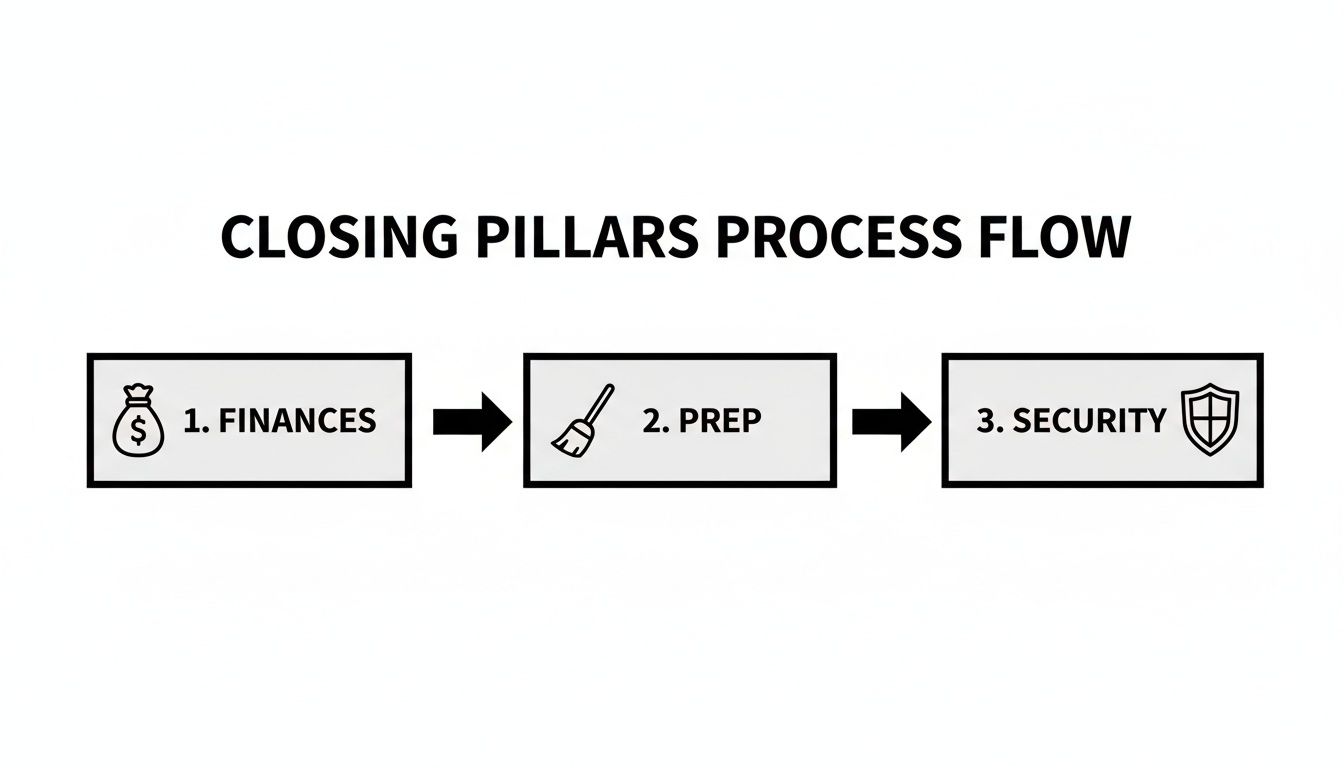
As you can see, a solid financial wrap-up is the foundation. From there, you prep the store for the next day, and finally, you secure the building.
Counting Down the Till
The first, most hands-on task is cashing out. Find a quiet, secure spot—usually the back office—where you can focus without distractions. The mission is simple: make sure the cash in the drawer matches what your Point of Sale (POS) system says should be there.
Kick things off by printing your end-of-day report from the POS. You might know it as a "Z-report" or "X-report." This piece of paper is your roadmap, showing all the day's sales broken down by cash, credit, gift cards, and whatever other payment types you accept.
With the report in hand, it's time to count the physical cash. Here’s a simple, foolproof way to do it:
- Pull Out Your Float: The very first thing you do is take out the starting cash you began the day with. If your standard float is $200, count that amount out and set it aside.
- Count What's Left: Now, count up every remaining bill and coin. This total is what you brought in from cash sales.
- Check It Against the Z-Report: Compare the cash you just counted to the "cash sales" line on your Z-report. In a perfect world, they'll match to the penny.
I’ve seen it a hundred times: someone tries to rush the count on the sales floor while other staff are cleaning up. That's a recipe for mistakes. Always handle cash in a secure, designated area to keep errors to a minimum.
What to Do When the Numbers Don't Add Up
So, what happens if the numbers are off? First, don't panic. A small difference, or variance, is often just human error. Maybe two bills were stuck together, or you simply miscounted. Do a quick recount.
If the numbers are still off after a second count, it's time to do a little digging. Pull up the transaction log on your POS. Did a cashier give out the wrong change on a large purchase? Was a big cash sale keyed in incorrectly? Whatever the reason, document the discrepancy in your manager's log, even if it's just a few cents. If you notice consistent shortages, it might mean a cashier needs a bit more training, or it could be a sign of a bigger problem.
Batching Out and Prepping the Deposit
Cash is squared away. Next up: credit and debit cards. Most modern POS systems handle this automatically by "batching out," but you should always double-check that the process actually ran. Batching is what sends all your credit card transaction data to your payment processor so the money can start moving to your bank account.
Once every payment type is reconciled, you can get the bank deposit ready.
- Combine the Cash: Gather the day's cash earnings from all registers. Remember to leave the starting floats in their tills for tomorrow.
- Fill Out the Deposit Slip: Carefully complete the bank deposit slip. The total here has to match your Z-report's cash total exactly.
- Bag It Up: Place the cash and the completed deposit slip into a tamper-evident deposit bag. Seal it, and lock it in the store safe overnight.
Keeping meticulous records is just as critical as handling the cash itself. The retail world is always changing, and having clean financial data is non-negotiable. With e-commerce projected to hit 20.6% of total retail sales by 2027, a brick-and-mortar store's survival depends on running a tight ship. Accurate books are a huge part of that. If you're interested, you can learn more about these retail trends and how they affect store operations.
Leaving a Paper Trail for Everything
Finally, make sure every single financial move has been documented. Your POS tracks sales, but what about the little things? Say a manager had to use $20 from the till for emergency cleaning supplies. That needs a paper trail. Using a straightforward Retail Receipt Template is a perfect way to create an instant record, so the drawer still balances perfectly. It’s a simple step that prevents big headaches later. The same goes for things like company vehicle fill-ups; a Gas Receipt can be used to track that expense properly. Little habits like these ensure every dollar is accounted for.
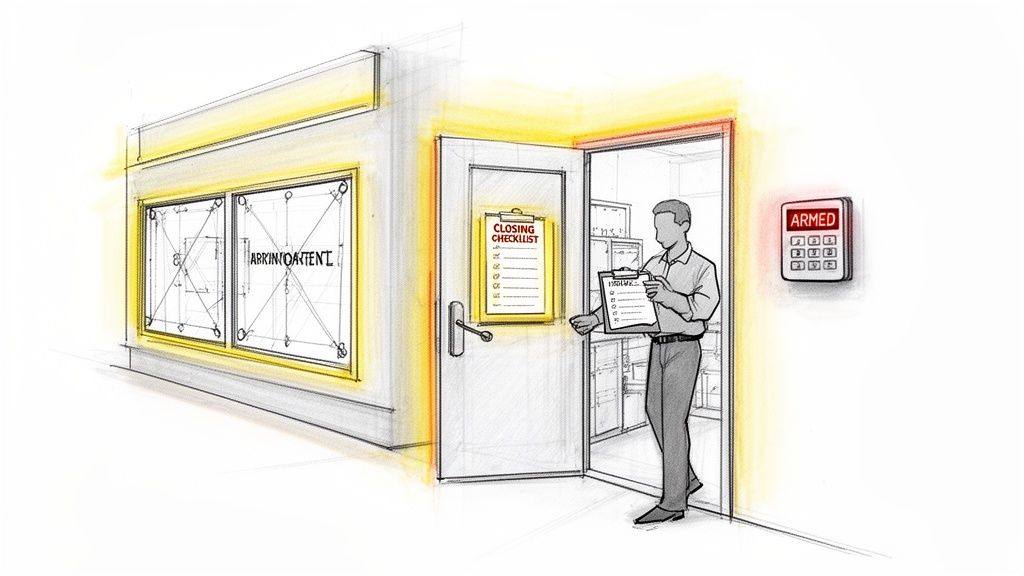
Securing The Store And Protecting Your Assets
Once the money is counted and the deposit is prepped, it's time to shift your focus from financial assets to physical ones. Securing the store is one of the most critical parts of your retail store closing procedures—a careful, step-by-step process that ensures everything, and everyone, is safe and sound overnight. A single overlooked door or window can completely undermine all your other hard work.
This isn't just about flipping a lock; it's about a systematic sweep that leaves no room for error. The closing manager should own this process, turning it into a routine that becomes second nature.
The Internal Security Sweep
Before you can even think about locking the front door, you need to be 100% certain the store is empty. A customer who accidentally stayed behind, or someone hiding intentionally, is a massive security risk. Your internal sweep has to be thorough and consistent every single night.
Start by checking all the nooks and crannies where someone could be hiding. This is a non-negotiable part of the closing checklist.
- Fitting Rooms: Don't just peek under the door. Physically open the door to every single stall.
- Restrooms: Check each stall here, too. It's a good habit to announce you're coming in, just in case someone was missed and you can avoid startling them.
- Stockroom and Back Offices: Walk through every non-public area. Check behind big shelving units, inside closets, and any other potential hiding spot.
This is your first line of defense. I once worked with a manager at a clothing store who found a teenager fast asleep in a fitting room a full hour after close. It was an honest mistake, but it drove home just how easily someone can be missed if you don't physically check every single space.
Locking Down All Access Points
With the interior clear, it's time to secure the perimeter from the inside. The key is to work systematically, starting from the back of the store and moving toward your final exit. This simple flow prevents you from accidentally locking yourself or another team member out.
Your sequence should look something like this:
- Secure All Secondary Exits: Lock any back doors, delivery entrances, and fire exits first. Always give the handle a good jiggle to confirm the deadbolt is engaged.
- Check Windows and Vents: Make sure all ground-floor windows are locked tight. Don't forget to check any accessible vents or secondary openings that could be a weak point.
- Final Exit: The last door to be secured should be your main entrance or the designated staff exit door.
A common mistake is locking the main door first and then doing the internal sweep. This creates a serious safety hazard if you need to get out fast and can lead to staff being accidentally locked in. Always clear the building before securing that final exit.
Arming The Alarm And External Checks
Activating the security system is one of the last, and most important, steps. Every employee with closing duties needs to be an expert on how to arm your specific system—they should know the codes, what different chimes or beeps mean, and how to fix common issues like a sensor fault from a slightly ajar door.
Always document any alarm issues. For example, if you have to call out a security technician for a repair, using a Service Receipt is a great way to keep a clear financial record of the visit.
After setting the alarm and locking that final door, your job isn't quite done. One last external check is in order.
- Confirm Doors are Secure: Pull on the main entrance from the outside to make sure it’s truly locked.
- Check Perimeter Lighting: Are all the external lights on and working? A brightly lit storefront is a huge deterrent for potential thieves.
- Secure Outdoor Items: If you have any outdoor displays, furniture, or signs, make sure they’re all brought inside or chained down.
This final walkthrough gives you peace of mind. It confirms your methodical process has worked, protecting the store, your inventory, and your team's hard work. Now you're all set for a safe and secure start to the next business day.
Prepping The Store For A Profitable Next Day
A great close doesn't just wrap up the day—it jumpstarts the next one. The last hour of any retail shift is all about hitting the reset button on the sales floor. You’re transforming a space that’s seen hundreds of customers back into a clean, inviting shop, ready for tomorrow's first visitor. This isn't just tidying up; it’s a core part of your retail store closing procedures and directly impacts the morning team's morale and your store's profitability.
Think about it: getting this right is more critical than ever. In a tough market, operational hiccups can be fatal. With 7,325 store locations shutting their doors in 2024 alone, it's clear that efficiency and a stellar customer experience are non-negotiable for survival. A smooth, well-executed closing routine is your secret weapon.
The Art Of Store Recovery And Restocking
In retail, we call putting the store back together "recovery." It's the process of making sure every single item is back in its proper home, exactly where a customer expects to find it. A messy store doesn't just look bad; it screams "we don't care," which can lose you a sale before you even say hello.
The best way to tackle recovery is to divide and conquer. Assign different zones of the store to each closing team member. Their mission is to walk their section and knock out a few key tasks:
- Rescue Stray Items: Hunt down products left at the cash wrap, abandoned in fitting rooms, or dumped on the wrong shelf. Get them back where they belong.
- Face The Shelves: This is a classic retail move for a reason. "Facing" simply means pulling all products to the front edge of the shelf with the labels turned forward. It’s a small detail that makes your store look full, organized, and professional.
- Refill The Hot Zones: What were your best-sellers today? Take a quick look and identify popular items that are running low. A quick run to the stockroom to replenish these key areas ensures you don't miss out on easy sales first thing in the morning.
This simple routine is the foundation of a great opening, creating a welcoming atmosphere that encourages people to browse and, more importantly, to buy.
Delegating End-Of-Day Cleaning Duties
Let’s be honest: a clean store sells more. Dust on the shelves, fingerprints on the glass, and dirty floors are a huge turn-off for shoppers. While you might use professional retail store cleaning services for the heavy lifting, the daily upkeep is on your closing crew.
Don't just hope it gets done. A simple, laminated checklist is your best friend here. It makes it easy to delegate tasks and have staff initial their work when it’s finished.
Here’s a quick-glance checklist that covers the essential closing tasks, making sure your team hits all the critical points for a smooth and secure end-of-day process.
Daily Store Closing Checklist
A summary of essential closing tasks organized by category to ensure a smooth and secure closing process every day.
| Category | Task | Key Action | Verification |
|---|---|---|---|
| Sales Floor | Floors | Sweep or vacuum main sales floor and back-of-house areas. | Visually inspect for cleanliness. |
| Surfaces | Counters & Displays | Wipe down cash wrap, display tables, and any glass surfaces. | Check for smudges and dust. |
| High-Touch Points | Sanitization | Sanitize door handles, PIN pads, and fitting room benches. | Ensure surfaces are dry and clean. |
| Facilities | Restrooms | Check/restock supplies, empty trash, and wipe down sinks/counters. | Manager checks before leaving. |
| Waste | Trash & Recycling | Empty all bins from the sales floor, offices, and break areas. | All bins should be empty for the morning shift. |
Breaking these jobs down makes them feel less like a chore and more like a routine. It’s a team effort that really pays off when that first customer walks into a sparkling clean shop tomorrow morning.
Your closing cleaning routine is a direct investment in the next day's sales. A pristine store doesn't just look good—it communicates quality and professionalism, encouraging customers to spend more time and money.
Managing Damaged Goods And Internal Expenses
While recovering the store, your team will inevitably find items that are damaged, opened, or just plain unsellable. You can't just toss these in the bin and forget about them. That’s a fast track to inventory shrinkage and messed-up stock counts, a silent profit killer for many businesses.
You need a rock-solid process for this.
- Set Up a "Hospital" Bin: Designate a specific shelf or bin in the stockroom for all damaged or defective products.
- Log Every Item: Use a simple log sheet (or a function in your POS) to record each item you're writing off. Note the product name, the reason for the damage, and the date.
- Get a Manager Sign-Off: Require a manager to review and sign the damage log every night. This simple step adds a crucial layer of accountability.
The same logic applies to any internal expenses. Let's say you ran out of cleaning spray and had to buy some from the store next door using petty cash. That needs a paper trail. Creating a Generic Sales Receipt is a perfect way to document these small but important expenses. This discipline keeps your financial records clean and ensures every single dollar is accounted for.
Finalizing Your End-of-Day Documentation
Once the money's counted and the doors are locked, there's one last critical step: communication. Great documentation is the bridge between your closing shift and the team that walks in tomorrow morning. It’s what ensures a smooth handover, stops little problems from becoming big ones, and gives management a clear record of the day's business. This isn't just about filling out forms; it's a core part of your retail store closing procedures.
The goal here is to create a complete end-of-day report that serves as a snapshot of the entire shift. It tells the official story of the day through data, figures, and clear notes, giving crucial context to anyone who wasn't there.

Crafting The Perfect End-of-Day Report
A solid end-of-day report tells a story, not just with numbers, but with context. The key is consistency. You need a standardized form so that every closing manager fills it out the exact same way, every single night. That consistency is what makes the information reliable and easy to scan quickly.
At a minimum, your report must include these core elements:
- Total Sales Figures: The gross and net sales for the day, pulled right from your POS Z-report.
- Payment Breakdown: A quick summary of how people paid—cash, credit, gift cards, you name it.
- Cash Drawer Reconciliation: The final cash count, the starting float, and any overage or shortage.
- Bank Deposit Details: The total amount you've prepped for the bank, which should match up with your cash sales.
But the numbers only tell half the story. The most valuable part of any report is the notes section. This is where a manager explains anything out of the ordinary. A note like "register was off" is completely useless. A helpful note sounds like this: "Register 2 was short by $5.25. I double-checked the transactions and think it happened when we gave incorrect change on a big cash sale around 4:15 PM." See the difference? That's actionable information.
Think of your end-of-day report as the one document you'd want to read if you were coming in to open the next day. What information would you need to be fully prepared? That's what should be in the report.
Filing And Storing Essential Paperwork
With the report done, it’s time to organize. You can’t just leave a pile of sensitive financial documents sitting on a desk. A disciplined filing system is non-negotiable for both security and easy access down the road.
Get a dedicated binder or folder for each day's closing paperwork. This daily bundle should always contain:
- The completed End-of-Day Report.
- The POS Z-Report.
- The credit card terminal settlement slip.
- A copy of your bank deposit slip.
- Receipts for any petty cash used.
For those one-off cash purchases or refunds where you don't have a standard POS receipt, something like a customizable Cash Receipt Template can be a lifesaver. It creates a clean, professional record on the spot, ensuring no transaction goes undocumented. Proper record-keeping is just good business, and you can find a variety of templates and tools to make it easier over at ReceiptMake.
The Manager's Logbook: A Tool For Handovers
While the end-of-day report covers the hard data, the manager's logbook is all about the human side of running the store. This can be a simple spiral notebook or a shared digital file where managers leave notes for each other. It’s the perfect place to pass along crucial information that isn't purely financial.
Great things to include in the logbook are:
- Maintenance Issues: "The light in the back stockroom is flickering again. I called maintenance; they'll be here tomorrow morning."
- Staffing Notes: "Sarah called out sick for her opening shift tomorrow. I got Mark to agree to cover it."
- Customer Incidents: "A customer around 7 PM was very unhappy with our return policy. I handled it, but she mentioned she might call corporate."
- Inventory Updates: "The shipment from Acme Co. arrived, but we're missing three boxes. I've already emailed our supplier."
This logbook is the glue that holds a management team together. It stops important details from falling through the cracks during shift changes and keeps everyone in the loop for a much smoother operation.
This kind of meticulous documentation is more important than ever. With the rise in U.S. store closures—5,822 were tracked by mid-year 2025—the pressure on brick-and-mortar retailers is immense. This trend shows why operational excellence, including flawless record-keeping, is no longer just a good idea; it’s a survival tactic. You can discover more insights about these retail real estate trends to understand the challenges facing the industry today.
Tackling Common End-of-Day Challenges
No matter how perfect your checklist is, questions and odd situations are bound to pop up when closing up shop. If you can get ahead of these common curveballs, your team will feel more confident and prepared to handle whatever the end of a long day throws at them.
When everyone knows the "why" behind the rules, they're more likely to get it right every time. Here’s how to handle some of the most frequent issues.
What’s the Single Most Important Closing Task?
Everything on the checklist matters, but if you had to pick one, financial reconciliation is king. Counting the cash, balancing it against your POS system's reports, and prepping the bank deposit are the steps that directly protect your store’s money.
Think of it this way: a missed mopping spot can be fixed in the morning. A cash shortage, on the other hand, is a real, immediate financial loss that's a lot harder to bounce back from. Getting the money right prevents major headaches and potential security issues down the road.
What Do We Do If the Cash Drawer Is Short?
Finding a cash shortage is a heart-sinking moment, but the most important thing is to stay calm and follow a clear process. The first step? Just recount everything. You’d be surprised how often a couple of bills are simply stuck together or a simple miscount is the culprit.
If you’ve counted twice and the drawer is still short, here’s what to do:
- Check the POS again. Take a hard look at the Z-report. Was a sale voided by mistake? Was a cash payment accidentally keyed in as a credit card?
- Write it all down. Make a note of the exact shortage amount in the manager's log and on the end-of-day paperwork.
- Tell your manager. Follow your store's policy and let the store manager or owner know right away.
- Keep a paper trail. If you need to pull from petty cash to balance the drawer, make sure to document it properly. Using a Cash Receipt Template ensures every penny is accounted for.
Any Tips for Making the Closing Process Faster?
Absolutely. Speed comes from two key ingredients: a solid routine and smart delegation. A standardized, written checklist is your best friend here—it removes the guesswork so nothing gets missed, even after a chaotic day.
Another game-changer is to start "pre-closing" tasks during that last hour of business. As things slow down, you can tackle light cleaning, restock shelves in quieter areas, or tidy up the stockroom before the last customer even walks out the door. Give each person a specific job—one person on recovery, another on cleaning—and you'll stop people from getting in each other's way.
The fastest closing shifts I’ve ever seen were run like a well-oiled machine. Everyone knew their role, got it done, and then came together to double-check each other's work. A practiced routine is always faster than a rushed one.
Is It Really Necessary to Have Two Employees Close Together?
Yes, 100%. This is a non-negotiable for two huge reasons: employee safety and asset protection. Having a partner present for the entire closing, especially when counting cash and walking out to the parking lot, is a massive deterrent to would-be thieves.
This "buddy system" also builds in accountability. With two sets of eyes on the cash count and lock-up checks, the chance of honest mistakes or even internal theft plummets. It’s a simple rule that protects your team and your business at the same time. And for any shared closing expenses, like a late-night taxi, a Generic Receipt makes reimbursement simple.
A seamless closing routine relies on clear procedures and having the right tools for the job. When it comes to creating clean, professional records for any transaction, ReceiptMake offers a free and incredibly simple solution. You can generate any receipt you need in just a few seconds, from sales slips to service invoices, using our library of customizable templates.

