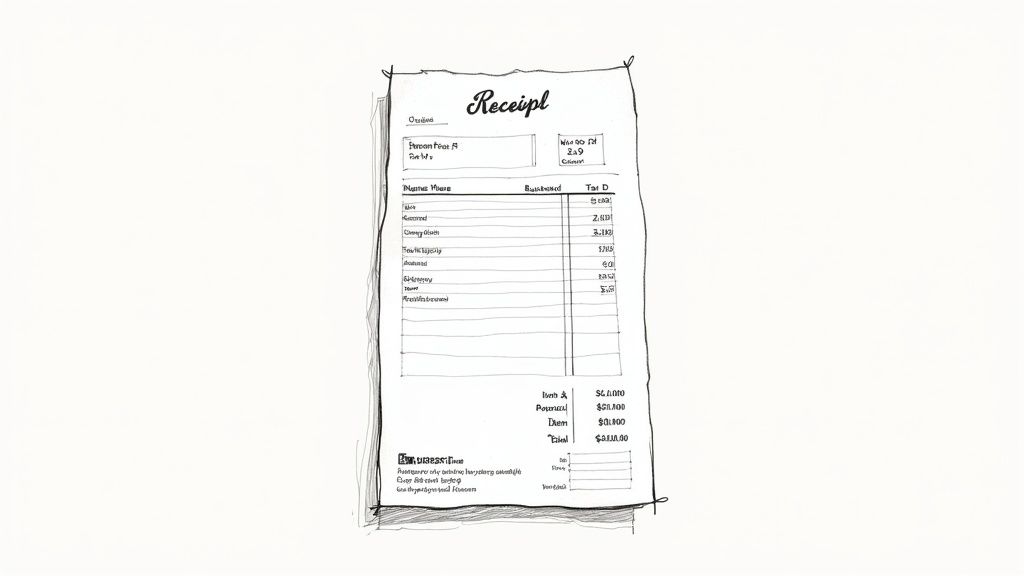
How to Print a Receipt That Looks Professional
A truly professional receipt is more than just a list of numbers on a piece of paper. It's about presenting that information in a way that builds trust and shows you care about quality. That little slip of paper is often the last physical thing a customer takes away from your business, so it’s your final chance to leave a great impression.
A clean, well-organized receipt isn't just for their records—it’s a final statement about your professionalism.
Why a Professional Printed Receipt Still Matters
Even with everything going digital, a physical receipt holds a special kind of weight. It's tangible proof of a purchase, which is essential for customers who need to make a return, expense a purchase for work, or just keep track of their spending.
For your business, it's a critical record for accurate bookkeeping and managing inventory. Think of it as the final handshake after a sale. You want it to be firm and confident, not flimsy and confusing.
This final touchpoint is a chance to reinforce your brand's credibility. A poorly formatted, hard-to-read receipt can make a customer second-guess their purchase. On the flip side, a crisp, branded receipt communicates that you pay attention to the details and can be trusted.
The Unseen Value in a Slip of Paper
The ongoing need for reliable receipt printing is clear when you look at the market. The global commercial receipt printer market was valued at USD 129 million in 2024 and is projected to hit USD 173 million by 2032.
This growth continues even as digital payments make up over 60% of transactions in many places, proving that people still want and need physical records. It’s no surprise that thermal printers, loved for their speed, hold over 70% of this market, especially in fast-paced retail and hospitality spots. You can learn more about the future of commercial receipt printing and see where things are headed.
A well-designed receipt offers a few key benefits that go way beyond simple record-keeping:
- A Better Customer Experience: It helps customers easily see what they were charged for and understand their purchase. No guesswork involved.
- Hassle-Free Returns: Clear item descriptions and transaction details make the return or exchange process smooth and painless for everyone.
- Brand Reinforcement: Your logo and contact info keep your business front and center in the customer's mind.
- Legal and Financial Peace of Mind: It provides the official documentation needed for tax purposes and financial audits.
A professional receipt isn’t just another business expense. It’s a small but powerful investment in customer trust and operational efficiency. It shows you care about every single detail, from the moment a customer walks in to the final proof of their purchase.
Designing Your Receipt with ReceiptMake
Getting started with a blank slate can feel like a chore, but ReceiptMake is designed to get you from an empty page to a professional-looking receipt in just a few minutes. With over 100+ realistic templates built for different businesses, you'll have a great starting point.
The first move is to pick a template that feels right for your brand. Are you more minimalist and clean, or do you need a detailed grid for lots of line items? Seeing all the options helps you find a layout that makes your logo and branding pop.
Choosing The Right Template
You can quickly browse the template gallery and even filter by industry or style to find what you need. A good template will have a clean header, making your business details easy to read at a glance. Others might put more emphasis on the date or transaction ID with bigger fonts, which is great for record-keeping.
When you're picking one out, keep a few things in mind:
- Look at the spacing and font sizes. You want everything to be readable, not crammed together.
- Check where your logo goes. Make sure it doesn't cover up important transaction details.
- Confirm the template has all the fields you need, like itemized lists, tax lines, and discounts, to stay compliant.
Here’s a look at the ReceiptMake interface. You can see the template gallery right next to the customization panel, which makes it super easy to try out different looks.
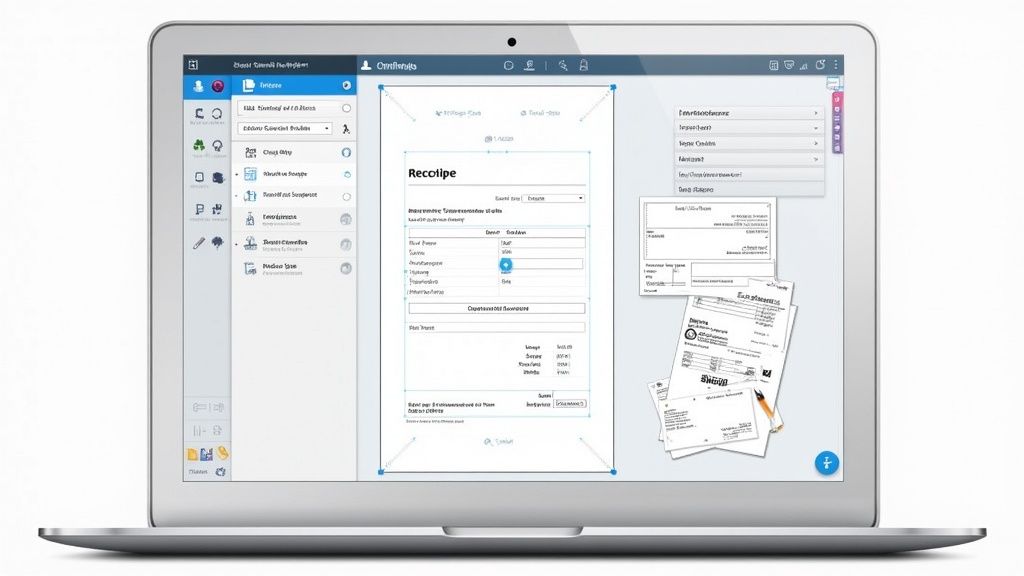
This side-by-side view is one of my favorite features because you can see your changes happen in real-time. It lets you fine-tune everything before you ever hit "print."
Entering Transaction Details
Once you've settled on a template, it’s time to plug in the actual transaction info. ReceiptMake handles all the standard fields you’d expect—item names, quantities, prices, and taxes. The best part? It crunches the numbers for you as you type.
For instance, if you add three bags of coffee at $12.99 each, the subtotal updates instantly. Then, you can add a tax rate you’ve set, and a tax line appears right where it should. If you offer a discount, it shows up as a negative line item, and the grand total adjusts accordingly. You can even add custom notes for things like order numbers or special offers.
Because every change shows up in the live preview, there are no surprises when it’s time to print. Getting this part right from the start saves paper and prevents customer confusion down the line.
Pro Tip: I always recommend running a quick "dummy" receipt first. Just plug in some test data to make sure all the totals and formatting look exactly how you want before you start printing for real customers.
If you need a little inspiration, you can explore our guide on ReceiptMake templates to see some creative ways other businesses structure their receipts.
Branding And Custom Messages
This is where you can add a personal touch. Uploading your logo (PNG or JPEG files up to 2MB) immediately makes the receipt feel like it's yours. It scales automatically, so you don't have to worry about it looking blurry or pixelated.
Don't stop there, though. A simple, personalized thank-you note or a QR code that links to your website can make a big difference. Based on user feedback, we've seen that small touch boost repeat visits by as much as 12%. It just shows you appreciate their business.
- Try to keep custom messages under 100 characters so they don’t mess with the layout.
- A clear call to action like "Visit Us Again!" or "Follow us on social!" can drive more engagement.
- Always print one sample to check the font size and make sure your message is easy to read.
Fine-Tuning With The Live Preview
The live preview is your best friend during this process. It instantly reflects every single tweak you make, which drastically cuts down on errors and speeds things up. You get a perfect pixel-for-pixel preview of what the final receipt will look like, whether you're printing from your browser or exporting it as a PDF.
Once you’re happy with how everything looks, just click "Download PDF" or use your browser's print function. From there, you can select your paper size and adjust margins in the print dialog. In seconds, you’ll have a crisp, professional receipt ready to hand over.
Key Insight: A polished digital preview is the secret to getting the perfect printed receipt on the first try, saving you time, ink, and paper.
Getting Your Printer Settings Dialed In
A great-looking receipt on your screen is one thing, but getting that same crisp, professional look on paper is where the rubber meets the road. Getting your printer settings right is the key to avoiding wasted paper, faded text, and those frustrating alignment issues that make your receipts look sloppy.
This part can feel a bit technical, but don't worry. It's usually just a matter of tweaking a few simple settings. Whether you're working with a standard office printer or a specialized thermal one, these adjustments will make all the difference.
Match the Paper to Your Printer
Nine times out of ten, printing problems come down to a mismatch between the digital receipt's width and the actual paper in your printer. Most thermal receipt printers you'll encounter use one of two standard sizes:
- 80mm (about 3.15 inches): This is the workhorse of the retail and restaurant world. It gives you plenty of room for itemized lists, your logo, and maybe even a quick promotional message.
- 58mm (about 2.28 inches): This is the slimmer, more compact option. It's perfect for mobile payment setups, coffee shops, or food trucks where counter space is at a premium.
When you hit print in your browser (usually Ctrl+P or Cmd+P), a print dialog box will pop up. Your first stop should be the "Paper Size" or "Paper Type" setting. Make sure it matches the paper you have loaded—this alone solves most cutoff issues.
My Pro Tip: I never print a real receipt without first hitting "Print Preview." This quick check lets you spot any glaring formatting errors instantly, all without wasting a single inch of thermal paper.
Nail the Margins and Scaling
Once the paper size is correct, the next step is to dial in the margins and scaling. Think of these settings as controlling how your content sits on the page, preventing it from looking squished, off-center, or just plain weird. A poorly scaled receipt can make your beautiful logo look distorted or important text nearly impossible to read.
In that same print dialog box, look for "Margins" and "Scale." Here’s my go-to process:
- Kill the Margins: Set your margins to 'None' or 'Minimum'. Receipt printers are built to print nearly edge-to-edge, so this lets your content use the full width of the paper as intended.
- Tweak the Scale: If things still look a little too big or small, start playing with the "Scale" option. I always begin at 100%. If text is getting chopped off, I'll nudge it down to 95% or even 90%. This tiny adjustment usually fixes any lingering alignment problems without shrinking the text into unreadability.
Getting these settings right ensures every element—from your business name at the top to the final total at the bottom—is perfectly placed and legible. It takes the receipt from being just a proof of purchase to a genuinely professional document. It's a small detail, but it speaks volumes about the quality and care you put into your entire business.
Troubleshooting Common Printing Glitches
Even with the best preparation, things can sometimes go sideways. A customer is waiting, and the receipt is coming out blank or looking like a mess. Here's a quick cheat sheet for the most common issues I've run into over the years.
| Problem | Likely Cause | Quick Fix |
|---|---|---|
| Receipt is completely blank | Paper roll loaded upside down | Flip the thermal paper roll over. Only one side is heat-sensitive. |
| Text is cut off on the sides | Incorrect paper size or scaling | Double-check that the "Paper Size" in print settings matches your roll (e.g., 80mm). If correct, try reducing the "Scale" to 95%. |
| Large empty space at top/bottom | Margins are set too high | In your browser's print settings, change "Margins" to "None" or "Minimum." |
| Print is faded or has white lines | Dirty thermal print head | Gently clean the print head with an isopropyl alcohol wipe. Make sure the printer is off and unplugged first! |
| Logo or text looks stretched/squished | Incorrect aspect ratio due to scaling | Reset the "Scale" to 100% and adjust margins first. If that doesn't work, try slightly different scaling percentages (98%, 102%) to find the sweet spot. |
| Characters look garbled or like gibberish | Driver issue or wrong character encoding | Reinstall the printer driver. If that fails, check the printer's settings for a character encoding option (usually UTF-8). |
This table should get you out of most jams. Remember, a quick test print after making any change is the best way to confirm you've solved the problem before you're in front of a customer.
Choosing Between PDF Export and Direct Printing
https://www.youtube.com/embed/Pgy7uJdkCgE
Once you've tweaked your receipt and it looks just right in the live preview, you've got one last call to make. Do you print it straight from your browser, or is it better to export it as a PDF first? Honestly, the right answer really comes down to what you need in the moment.
Direct printing is your go-to for speed. Think about a packed coffee shop during the morning rush. In that situation, just hitting the print button for an immediate, on-the-spot receipt is the quickest way to keep the line moving. No saving files, no opening other apps—just pure efficiency.
On the other hand, exporting to PDF gives you total control and rock-solid consistency. The PDF format essentially locks in your design, making sure that what you see on your screen is exactly what gets printed, regardless of the printer or computer you use.
The Case for PDF Export
Saving a receipt as a PDF is the gold standard for solid record-keeping and flexibility. This route gives you a digital copy you can easily email to a customer, tuck away for your own accounting, or print out whenever you need it. It's the perfect choice when a transaction needs to be properly documented for later, like for a big-ticket sale or a business expense claim.
A PDF ensures every single detail, from your logo down to the fine print, is preserved perfectly. That kind of consistency is a big deal for maintaining a professional look.
- Guaranteed Formatting: PDFs are your best defense against those frustrating, unexpected shifts in layout, fonts, or margins that can sometimes pop up when printing directly from different web browsers.
- Digital Trail: You get a clean, easy way to build a digital archive of all your sales, which is a lifesaver for bookkeeping and especially during tax season.
- Customer Convenience: Many customers actually prefer a digital copy they can get via email, especially if they track their expenses online.
This decision tree gives you a quick visual for troubleshooting common snags you might hit when trying to print a receipt.
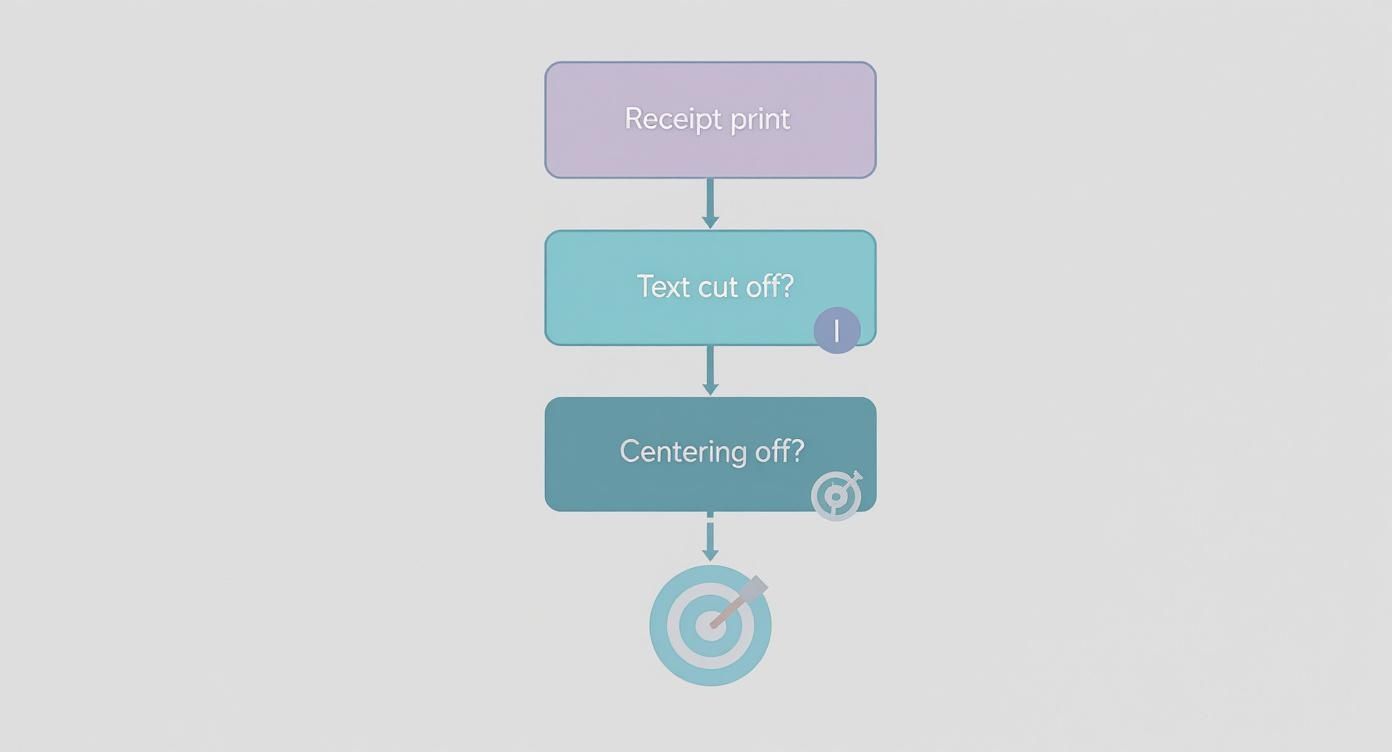
As you can see, most printing headaches trace back to simple scaling or alignment settings—problems a PDF can help you sidestep entirely by standardizing the output.
When Direct Browser Printing Wins
For high-volume situations, nothing beats the pure efficiency of printing directly from your browser. When a customer just needs a quick proof of purchase for a small item, the instant receipt spitting out of a thermal printer is exactly what you need.
This method really shines in retail and hospitality, where speed has a direct impact on how happy your customers are. It’s no surprise that the global market for POS receipt printers is projected to climb from USD 4.83 billion in 2025 to USD 13.84 billion by 2035. That growth is largely fueled by the demand for fast, seamless solutions in these fast-paced sectors. You can read more about the future of the POS receipt printer market to see where things are headed.
From my experience, the best workflow is often a mix of both. Use direct printing for your everyday, in-and-out transactions. Then, switch over to PDF exports for those larger sales, business clients, or anytime a customer asks for a digital copy.
At the end of the day, both methods are powerful tools in your arsenal. Knowing when to use each one will make your entire process run that much smoother. If you want to see for yourself, you can easily generate a custom receipt and try out both printing options.
What Every Business Receipt Needs to Include
A receipt isn’t just a slip of paper with numbers on it—it’s a crucial business document. It acts as the official record of a sale for both you and your customer, and getting it right is non-negotiable for accounting, tax purposes, and handling any potential disputes.
Think of these details as the receipt's DNA. Without them, it's not a valid record. Including these key pieces of information transforms a simple sales slip into a document that protects your business and gives your customers exactly what they need for their own records.
The Must-Have Information
For any receipt to be considered legitimate, it has to answer the basic questions of a transaction: who, what, where, when, and how much. If you leave any of these out, you’re creating a potential headache down the road, whether it's for a customer trying to expense a purchase or for your own bookkeeper.
Here’s what every professional receipt should clearly show:
- Your Business Information: This means your official business name, address, and phone number.
- Date and Time of Transaction: Pinpoint the exact moment the sale was made.
- A Unique Receipt or Transaction ID: A sequential number makes every single sale easy to track.
- Itemized List of Products or Services: Each item needs to be listed separately with its quantity and price.
- Subtotal, Taxes, and Grand Total: A crystal-clear breakdown of all costs is just good business.
- Payment Method: Show how the customer paid—Cash, Visa ending in ****1234, etc.
A well-structured receipt builds trust. It quietly tells your customer you're organized, transparent, and professional, right down to the final piece of paper they walk away with.
Taking Your Receipt Beyond the Basics
Once you have the essentials locked down, you can start thinking about how to make your receipt work a little harder for you. This is where a simple proof of purchase can become a subtle marketing tool. The easiest and most impactful addition is your logo—it instantly makes the receipt look professional and reinforces your brand.
But why stop there? Consider adding a short, clear return policy to manage expectations and head off future disagreements. A simple "Thank you for your business!" or a QR code linking to a customer satisfaction survey adds a personal touch that people remember.
These small additions turn a purely functional document into a final, positive brand interaction. If you want to see how this looks in practice, check out a clean and effective Generic POS Receipt template for some ideas.
It's interesting to note that even with digital everything, physical receipts are holding their own. The global market for paper receipt rolls is actually projected to grow significantly through 2033. This is partly because of e-commerce returns and the fact that many small businesses still rely on printed confirmations. You can find more on the surprising resilience of the paper receipt market and see why it remains so important.
Your Top Printing Questions, Answered
Even with the best tools, hitting that "print" button can sometimes throw a curveball. When you're trying to get a receipt into a customer's hand, the last thing you need is a technical hiccup.
We've been there. So, we've gathered some of the most common questions we hear and provided practical answers to get you back on track fast.
What Kind of Paper Should I Use?
This one's simple: it all comes down to your printer. If you're using a dedicated receipt printer—the kind you see in most stores—you'll need thermal paper. This special paper uses heat to create the print, which is why these printers don't use ink.
The crucial part is getting the right width. Two sizes dominate the market:
- 80mm (~3.15 inches): This is the standard for most countertop POS systems in retail and restaurants.
- 58mm (~2.28 inches): You’ll typically find this narrower size in mobile printers or smaller, more compact units.
Using the wrong size is the single biggest reason why text gets cut off. Do yourself a favor and double-check your printer’s specs before you buy a new box of rolls. If you're just printing a PDF from a standard office printer, regular old copy paper will work just fine.
Can I Print a Receipt from My Phone?
Yes, absolutely! Printing directly from your phone is a game-changer for anyone who isn't tied to a desk. It's perfect for food trucks, market vendors, or field service technicians.
Most modern receipt printers are built for this and connect via Bluetooth or Wi-Fi. Pairing one with your phone is usually as easy as connecting a pair of wireless earbuds. Once you're linked up, your phone's print menu will see the receipt printer as an option, and you can print on the spot.
A Pro Tip from Experience: If your receipts are coming out completely blank, don't panic. 99% of the time, the thermal paper roll is just loaded upside down. Flip it over and try again. It's a surprisingly common mistake with a very simple fix!
Why Does My Printed Receipt Look Different from the Preview?
Ah, the classic "it looked perfect on screen" problem. This almost always comes down to a communication breakdown between the live preview in your browser and your printer's settings.
The preview in a tool like ReceiptMake is a pixel-perfect digital rendering. But when you hit print, your browser and printer drivers take over, and they can add their own interpretations, like extra margins or weird scaling.
If your final print looks off—maybe the logo is squished or the text is misaligned—check these settings in the print dialog box before you click "Print" again:
- Margins: Look for a "Margins" setting and change it to 'None' or 'Minimum'. This is the top culprit for extra white space pushing your content around.
- Scale: If everything looks too big or too small, play with the scale. Bumping it down from 100% to 95%, or up to 105%, often snaps everything back into place.
- Print to PDF First: For a foolproof method, use your browser's "Save as PDF" function. This essentially takes a perfect snapshot of the receipt, locking in all the formatting. The PDF will print exactly as it looks on screen, every single time.
Taking a few seconds to check these settings will save you a ton of paper and frustration. It’s the key to making sure every receipt looks clean, professional, and is easy for your customers to read.
Ready to create flawless receipts every time? With ReceiptMake, you can choose from over 100 templates, customize every detail, and print a professional receipt in seconds. Try it now, completely free.

