Create a Perfect Itemized Receipt Template
At its core, an itemized receipt template is a reusable framework that helps you create detailed, professional receipts. Instead of just showing a grand total, it breaks down a transaction into individual line items—listing out each product or service, its quantity, the rate, and the subtotal for each. This level of detail is crucial for good record-keeping, building client trust, and making expense management a whole lot easier.
Why Your Business Needs a Solid Itemized Receipt
Let's be honest, receipts can feel like a chore. But a well-crafted itemized receipt is one of your most powerful tools for building client trust and keeping your finances in order. This simple document is far more than just proof of purchase; it's a cornerstone of a well-run, professional business.

Preventing Disputes and Building Trust
Imagine you’re a freelance web developer who just wrapped up a big project. Your final invoice includes charges for design, coding, content integration, and a premium plugin you had to buy. If you just send a receipt with a single total, your client might get confused, leading to a lot of back-and-forth questions or even a payment dispute.
An itemized receipt, on the other hand, lays it all out clearly:
- Web Design: 15 hours @ $75/hour
- Development: 25 hours @ $90/hour
- Content Integration: 8 hours @ $50/hour
- Premium Security Plugin: 1 license @ $99
This breakdown gives the client complete transparency. They see exactly where their money went, which justifies your final cost and reinforces your professionalism. It's a simple way to make clients feel confident in your work and your billing practices.
Before we dive deeper, here's a quick look at the absolute must-haves for any itemized receipt. Think of this as your foundational checklist.
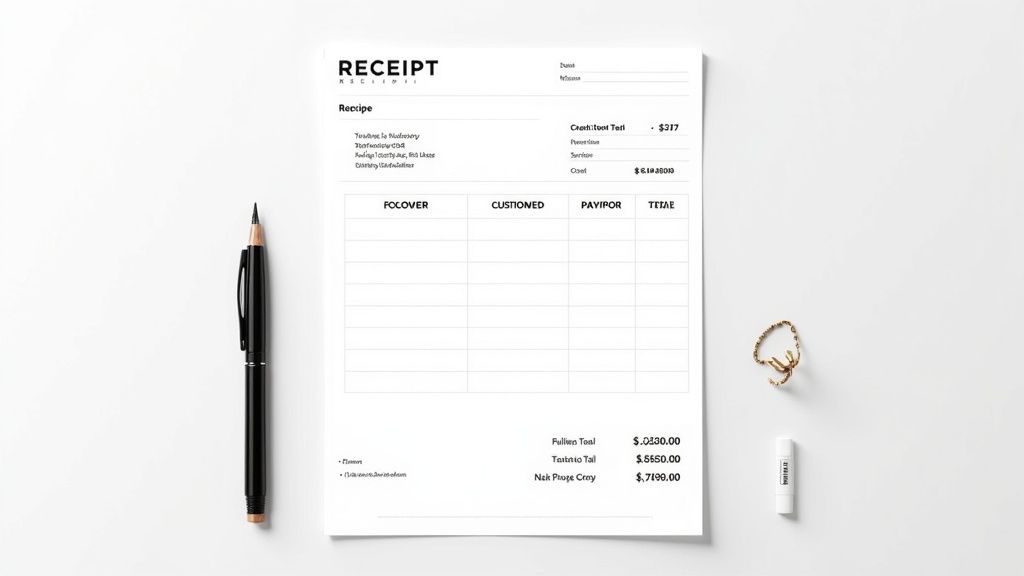
Essential Components of an Itemized Receipt
| Component | Description | Why It Matters |
|---|---|---|
| Your Business Information | Your company name, address, phone number, and email. | Identifies you as the seller and makes it easy for customers to contact you. |
| Customer Information | The customer's name and contact details. | Personalizes the receipt and helps with your record-keeping. |
| Receipt Number | A unique identifier for the transaction (e.g., #00123). | Prevents duplicate entries and makes it easy to track or reference specific sales. |
| Date of Transaction | The date the sale occurred. | Establishes a clear timeline for your financial records and any potential returns. |
| Itemized List | A breakdown of each product/service with quantity, description, unit price, and total. | This is the core of the receipt, providing transparency and justifying the total cost. |
| Subtotal | The total cost of all items before taxes and discounts. | Shows the base cost and is the starting point for final calculations. |
| Taxes, Discounts & Fees | Any applicable sales tax, discounts, or additional charges listed separately. | Ensures accuracy and compliance while explaining any adjustments to the subtotal. |
| Grand Total | The final amount paid by the customer. | This is the most important number—it needs to be clear, bold, and correct. |
| Payment Method | How the customer paid (e.g., Credit Card, Cash, Bank Transfer). | Useful for financial reconciliation and tracking payment trends. |
Getting these elements right from the start will make your receipts far more effective for both you and your customers.
Simplifying Financial Management
Clear documentation is the bedrock of stress-free bookkeeping. For both your internal accounting and tax preparation, itemized receipts are invaluable. They create a clean, auditable trail of transactions, making it easy to categorize expenses and track income with precision.
An itemized receipt isn’t just for your customer—it’s a critical tool for your own financial clarity. It transforms a vague total into actionable data, helping you understand where your revenue comes from and how project costs break down.
This becomes especially important when you’re managing team expenses. Poor expense tracking contributes to cash flow problems for roughly 61% of businesses. By requiring employees to submit itemized receipts for things like travel or supplies, companies can spot out-of-policy spending and significantly reduce the risk of fraud. You can learn more about managing corporate travel expenses and how to prevent fraud to see how deep this goes.
Ultimately, using a consistent itemized receipt template ensures every transaction is documented the right way, every time. This simple habit can save you countless headaches during tax season and give you a clear financial snapshot of your business whenever you need it.
Building Your Receipt Template from the Ground Up
You don't need any fancy accounting software to create a professional-looking receipt. Honestly, the tools you probably use every day—like Google Docs, Microsoft Word, or even Google Sheets—are more than capable. The real advantage of creating your own itemized receipt template is the control it gives you. You can build it from scratch to fit your business perfectly, reinforcing your brand and giving clients total clarity.
The secret is to think of the document in three distinct parts: the header, the body, and the footer. Each one has a specific job, and getting them right is the key to a receipt that’s both professional and easy to understand. Let’s walk through how to build each section for the best results.
Designing a Clean and Informative Header
This is the first thing your client will see, so think of it as your digital letterhead. It needs to establish who you are instantly. A good header is clean, branded, and has all the key information right at the top.
Make sure your header clearly displays:
- Your Business Logo: Put your logo front and center, usually at the top left or in the middle. It’s your most important branding element.
- Your Business Name and Contact Information: This includes your official business name, address, phone number, and email. Don't make clients hunt for this info if they have a question.
- The Title "Receipt": It sounds obvious, but you’d be surprised. Clearly labeling the document as a "Receipt" or "Itemized Receipt" ensures no one mistakes it for an invoice or a quote.
Over on the other side of the page, typically the top right, you'll put the transaction-specific details. This keeps the layout balanced and makes the information scannable. This section should have the Receipt Number (use a simple sequence like #001, #002), the Date of Transaction, and if it makes sense for your business, a Payment Due Date.
Crafting the Core: The Line Item Table
This is the heart of your itemized receipt. A clean, organized table is non-negotiable here, as it provides the transparency clients appreciate. It breaks down exactly what they paid for, which goes a long way in preventing confusion or disputes later. A simple grid is all you need—don't overcomplicate it.
For instance, a freelance graphic designer’s receipt table might look like this:
| Description | Quantity | Rate | Amount |
|---|---|---|---|
| Logo Design Concept & 3 Revisions | 1 | $750.00 | $750.00 |
| Business Card Design | 1 | $250.00 | $250.00 |
| Social Media Graphics Package | 10 | $45.00 | $450.00 |
This layout is intuitive. Each row is a separate product or service, making it crystal clear what contributes to the total. I'd recommend using a spreadsheet program like Google Sheets or Excel for this. You can set up simple formulas to automatically calculate the "Amount" column (Quantity × Rate), which seriously cuts down on the risk of manual math errors.
Your goal with the line item table is to answer questions before they're even asked. When a client can easily trace the final total back to specific, well-described services, you build trust and make the payment process much smoother.
Finalizing with a Clear and Concise Footer
The footer's job is to wrap everything up by summarizing the numbers and adding any final details. Right below your line item table, you need a section that cleanly presents the financial totals.
This summary should always include:
- Subtotal: The sum of all your line items, before any taxes or discounts.
- Discount: If you offered one, show the exact amount here.
- Taxes (e.g., Sales Tax, VAT): List any taxes as a separate line, and it’s good practice to show the rate, too.
- Grand Total: The final, bolded amount the client paid.
Underneath the financial breakdown, it's a good idea to add other key information. This is the perfect spot for the Payment Method (e.g., "Paid via Credit Card ending in 1234") and a simple, polite closing like, "Thank you for your business!" It’s a small detail that feels professional and personal.
The move to digital is making templates more essential than ever. A 2023 study showed that 84% of retailers in the UK now offer digital receipts, which just highlights the shift toward more efficient, consistent record-keeping. A solid digital template ensures your business looks professional and includes all the necessary legal and tax info every single time.
If you’d rather not start from a blank page, you can find dozens of professional itemized receipt templates on our site that are ready for you to customize for your industry. It’s a great way to save time while still getting a polished result with your own branding.
Ultimately, whether you build it yourself or adapt a template, the mission is the same: to create a document that's clear, accurate, and professional. By putting a little thought into the header, body, and footer, you’re not just making a proof of purchase—you’re creating a communication tool that strengthens client relationships and makes your own financial tracking a whole lot easier.
Fine-Tuning Your Template for Your Industry
A generic, one-size-fits-all receipt just doesn't work in the real world. The details a freelance writer needs to show are completely different from what a retail shop or a home repair service has to list. When you customize your itemized receipt template for your industry, it becomes more than just proof of purchase—it becomes a clear communication tool.
This kind of customization is all about preventing confusion and showing you're a professional. When a receipt mirrors how you actually do business, it answers a client's questions before they even think to ask. That usually means faster payments and happier customers. It proves you understand the details of your work and are transparent about how you bill for it.
Let's dig into the specific tweaks that make a huge difference for three common types of businesses: freelancers, retail stores, and service pros.
For Freelance Creatives and Consultants
As a freelancer, your value is often tied to your time, project milestones, or specific things you've created. Your itemized receipt has to spell this out clearly, justifying your final bill in a way a single project total never could. Just putting "Project Work" on an invoice is a surefire way to get an email asking for more details.
Instead, you have to get granular with your line items. Think about breaking that big project down into its core pieces.
Key Fields to Add:
- Project Phases: Instead of one line for "Website Design," split it into "Phase 1: Wireframing & UX," "Phase 2: Visual Design Mockups," and "Phase 3: Development & Launch."
- Hourly Rates vs. Flat Fees: Make it obvious which tasks were billed by the hour and which were a fixed price. For example, "Initial Consultation (2 hours @ $150/hr)" next to "Logo Design Package (Flat Fee)."
- Reimbursable Expenses: Did you have to buy stock photos, a font license, or other materials for the client? List them as separate line items. This transparency is absolutely critical for keeping trust.
For a freelancer, a well-itemized receipt is your final project report. It's the last piece of communication that summarizes the scope of your effort and demonstrates the comprehensive value you delivered.
For Retail and E-commerce Businesses
In retail, it’s all about clarity and speed. A customer needs to understand their purchase in a split second, especially if they might return something or are tracking expenses. Your receipt should have the same precision as a point-of-sale system, even if you’re making it by hand.
The details you include can directly affect your customer service workload and even your inventory. A clear receipt means fewer phone calls about confusing charges or return policies.
Essential Retail Fields:
- SKU or Item Number: Including a Stock Keeping Unit (SKU) helps both you and the customer identify the exact product. This is a lifesaver for returns and inventory tracking.
- Item-Specific Discounts: Don't just list a single discount at the bottom. Apply it right to the line item it belongs to, like "Men's T-Shirt (-20% Sale)." This avoids any confusion.
- Return Policy: Add a short, clear statement about your return or exchange policy right in the footer. Something like, "Returns accepted within 30 days with receipt for store credit only."
- Unit of Measure: For things sold by weight or volume, like produce or bulk candy, make sure to include the unit. For instance, "Organic Apples (1.5 lbs @ $2.99/lb)."
If you're looking for a good starting point, this generic POS receipt template gives you a great foundation. You can then add the retail-specific fields we just covered.
For Service-Based Professionals
If you're a plumber, electrician, IT consultant, or mechanic, your clients are paying for two things: your expertise (labor) and the parts you use. Not separating these two is one of the biggest reasons for disputes. A client might not get why a "simple fix" cost so much until they see the actual breakdown of parts and labor.
Your receipt absolutely must draw a clear line between what you charged for labor and what you charged for materials.
Crucial Service Industry Fields:
- Separate Labor and Materials: Create two different sections or just use clear labels for each line item. List all the parts under a "Materials" heading and your time under a "Labor" heading.
- Detailed Labor Description: Be specific. Instead of just writing "Labor," try something like, "Replaced faulty circuit breaker and tested all outlets (2.5 hours @ $95/hr)."
- Part Numbers: Whenever you can, include the part or model numbers for the materials you used. This adds a nice layer of transparency and helps the client see where the money went.
- Trip Fees or Service Call Charges: If you have a flat fee just for showing up, list it as its own line item right at the top. This way, it's clear and understood from the get-go.
Getting the Numbers Right Every Time
A small math error on a receipt can create a surprisingly big headache. It often leads to awkward client conversations, payment delays, and can chip away at the professional trust you’ve worked so hard to build. For any business owner, getting the financial details flawless isn't just a goal; it's a must.
This is especially true when discounts and taxes enter the picture. A simple mistake in the order you apply them can throw off the final total, leaving both you and your customer confused. Let's make sure your receipts are always accurate, compliant, and professional.
Calculating Line Item Totals
The bedrock of any accurate receipt is getting each line item total right. It’s simple multiplication, but this is where letting a template do the work for you is a huge time-saver, especially if you’re using a spreadsheet-based itemized receipt template.
For every service or product you list, the formula is always the same: Quantity × Unit Price = Line Total
Let's say you're an IT consultant billing for a recent job. Your spreadsheet rows might look something like this:
- On-site Diagnostic (Quantity: 1, Unit Price: $75.00) = $75.00
- Malware Removal (Quantity: 2, Unit Price: $50.00/hr) = $100.00
- Data Backup Service (Quantity: 1, Unit Price: $120.00) = $120.00
In your spreadsheet, a simple formula like =B2*C2 (if Quantity is in column B and Unit Price is in C) completely removes the risk of a manual typo. Add up all these line totals, and you get your subtotal—the next key number we need.
Handling Discounts and Taxes Correctly
This is where things can get a little tricky, and it’s a common point of confusion. Should the discount be applied before or after sales tax? The answer is clear: the standard (and legally required) practice in most regions is to apply the discount first.
Pro Tip: Always calculate sales tax on the discounted price, not the original subtotal. If you tax the full amount and then discount it, your customer is overpaying on tax, which can lead to compliance issues for you down the road.
Here’s the correct sequence to follow every time:
- Calculate the Subtotal: First, add up all your line item totals.
- Apply the Discount: Subtract the discount from the subtotal to get a new, lower total.
- Calculate the Tax: Now, apply the sales tax percentage to that discounted subtotal.
- Find the Grand Total: Finally, add the tax amount to the discounted subtotal.
Let's run the numbers with a $295.00 subtotal, a 10% discount, and a 7% sales tax:
- Discount Amount: $295.00 × 0.10 = $29.50
- New Subtotal: $295.00 - $29.50 = $265.50
- Tax Amount: $265.50 × 0.07 = $18.59
- Grand Total: $265.50 + $18.59 = $284.09
This flow shows how to break down the costs for any industry, whether you’re a freelancer, retailer, or service provider.
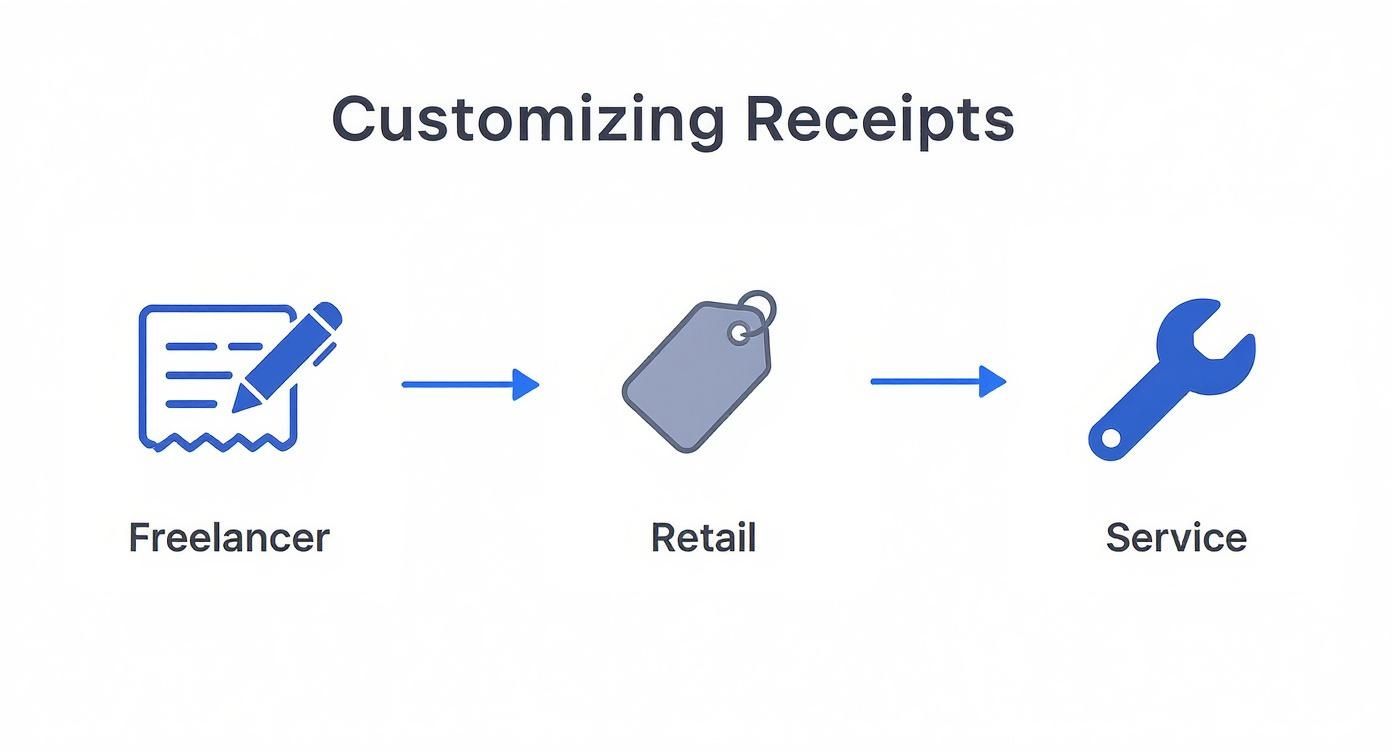
As the visualization shows, the core idea is always to break down what you're charging for into clear, easy-to-understand pieces, no matter your field.
Automating Calculations with Simple Formulas
If you're using a spreadsheet program like Google Sheets or Microsoft Excel for your itemized receipt template, you can automate these calculations to guarantee you get it right every single time. No more second-guessing.
Here are a few formulas you can copy and paste right into your sheet:
- Subtotal:
=SUM(D2:D10)(This adds up all the line totals in cells D2 through D10.) - Discount Amount:
=E11*0.10(Here, E11 is your subtotal cell and your discount is 10%.) - Tax Amount:
=(E11-E12)*0.07(This calculates the 7% tax on the subtotal after subtracting the discount.) - Grand Total:
=E11-E12+E13(Your final number: Subtotal - Discount + Tax.)
Beyond just keeping things organized, getting these details right is essential for tax compliance. Using digital tools helps categorize everything properly, making tax season far less stressful. You can find some great advice on how to digitize and categorize receipts for tax purposes on Shoeboxed.com to make your bookkeeping even smoother.
Ultimately, getting the numbers right isn't just good customer service—it’s smart business.
Finishing Touches: How to Design and Send a Professional Receipt
Getting the details right on your receipt is what elevates it from a simple piece of paper to a statement about your brand. A well-designed, professionally delivered receipt tells your clients you’re thorough and care about quality, which goes a long way in building trust.
Let's walk through the simple design choices that make a huge difference, then cover the best ways to get that receipt into your client's hands. First, let's talk about the look and feel. A cluttered or confusing receipt just creates headaches and can make you look disorganized. Clarity is always the goal.
You don’t have to be a designer to make something that looks good. The secret is simplicity.
Using Design to Build Trust
Good design isn't about fancy graphics; it's about making information easy to digest. For a receipt, that means focusing on readability and a clean, professional look. Simple tweaks to your fonts, colors, and spacing can completely transform your document.
Your most powerful tool here is white space. That's just a fancy term for the empty areas around your text and other elements. Resist the urge to cram everything together. Giving your content room to breathe with generous margins makes the whole thing feel less intimidating and naturally guides the eye to important bits, like the grand total.
Next up, choose a clean, readable font. This isn't the place for fancy script or decorative styles that are a pain to read, especially in smaller sizes. Stick with the classics that professionals use:
- Arial
- Helvetica
- Roboto
- Lato
These fonts look great on both screens and paper. A font size of 10-12 points for the main text is usually perfect—easy to read without having to squint.
Finally, add your branding, but don't overdo it. Pop your logo in the header and maybe use one or two of your brand colors for headings. The key is to be subtle. Your branding should complement the information, not scream over it.
Perfecting Your Delivery Method
How you send the receipt is just as crucial as how it looks. This is your last touchpoint for the transaction, so you want to make sure it’s smooth and professional.
Saving your receipt as a PDF is an absolute must. It's a universal format that locks in your design, ensuring it looks exactly the same on your client's computer as it did on yours. Unlike an editable Word doc, a PDF is secure and read-only. It prevents accidental edits and feels like a final, official record.
Think of a PDF as a digital snapshot of your transaction. It’s a locked-down document that protects both you and your client by creating a permanent financial record that's easy to file away and find later.
To keep your own files from becoming a chaotic mess, use a simple, consistent naming system. This will save you a world of pain later. A great format is:
Receipt-[ClientName]-[Date].pdf
For instance, Receipt-Smith-Designs-2024-10-26.pdf tells you everything you need to know at a glance. A system like this keeps your records tidy and makes searching for old transactions a breeze.
Crafting the Perfect Email
When it's time to send the receipt, the email you write sets the final tone. A simple, polite message is all it takes. No need for a novel—just give a little context and say thanks.
Your subject line should be clear and easy to spot in a crowded inbox. Something like "Receipt for Your Recent Purchase - [Your Business Name]" or "Receipt #[Receipt Number] from [Your Business Name]" works perfectly.
Here’s a quick email template you can tweak:
Subject: Your Receipt from [Your Business Name]
Hi [Client Name],
Thank you for your recent payment. I’ve attached the itemized receipt for your records.
It was a pleasure working with you on [Project Name/Service Provided]. Please let me know if you have any questions.
Best regards,
[Your Name] [Your Business Name]
This message hits all the right notes: it's friendly, professional, and provides all the context needed. It wraps up the transaction on a positive, organized note.
If you need to create polished receipts without getting bogged down in formatting, you can always use a free online receipt generator. These tools do all the heavy lifting, providing templates where you just plug in your details. By combining a professional design with a thoughtful delivery, you ensure every transaction ends on a high note, reinforcing your brand’s credibility.
Even with the best templates, you're bound to run into some specific questions. Creating and managing itemized receipts seems straightforward, but the devil is always in the details. This is where a little experience goes a long way.
Let’s tackle some of the most common questions I hear from business owners. Clearing up these points will help you handle your records like a pro.
How Long Should I Keep Itemized Receipts?
This is a big one. The short answer? Longer than you think.
While the exact rules depend on where you live, a good rule of thumb for any business is to keep financial records for at least three to seven years. This covers your bases for potential tax audits and gives you a solid paper trail for your own bookkeeping.
My advice: go digital. Scan your paper receipts and organize them by year and month in a cloud folder. A digital copy is searchable, won't fade, and can't get lost in a shoebox. It’s a lifesaver.
Are Digital Receipts Legally Valid?
Absolutely. For the most part, a digital copy of a receipt is just as good as the original paper version. Tax authorities and accountants generally accept them without issue.
The key is that the digital copy must be a clear, legible image of the original. It has to show all the critical details: the business's name, the date, the list of items, and the final total.
The move to digital isn't just a matter of convenience; it’s about having a secure and reliable record. A digital receipt is a perfect snapshot in time that won't fade, rip, or get ruined by a spilled coffee.
Modern accounting software makes this incredibly easy. You can just snap a picture with your phone and upload it. Years later, finding that one specific transaction is as simple as typing in a keyword.
What Is the Difference Between a Receipt and an Invoice?
This trips people up all the time, but the difference is all about timing and purpose.
- An invoice is a request for payment. You send it before you get paid to tell a customer, "Here's what you owe me."
- A receipt is proof of payment. You give it after you've been paid to say, "Thanks, we're all square."
Think of it this way: an invoice opens the transaction, and a receipt closes it. Your templates for each might look almost identical—just be sure to change the title and mark the invoice balance as paid when you turn it into a receipt.
Can I Create My Own Itemized Receipt Template?
Of course! You don't need fancy software or a pre-made form. As long as your custom itemized receipt template has all the essential information, it's perfectly legitimate.
Just make sure you include:
- Your business info and the customer's info
- The date and a unique receipt number
- A detailed breakdown of all items or services
- The subtotal, tax, and final total
You can build one in Google Docs, Excel, or whatever you're comfortable with. The most important things are that it looks professional, is easy for your customer to read, and—above all—is 100% accurate.
Ready to create flawless, professional receipts in seconds? ReceiptMake offers over 100 realistic templates for every industry, from retail to restaurants. Customize your logo, add line items with automatic calculations, and download a high-quality PDF—all for free, with no sign-up required. Try it now and see how easy professional record-keeping can be at https://receiptmake.com.

